
FREE Rufus the Dog Doorstop Crochet Pattern
PEACH UNICORN DESIGNS
Say hello to my new friend Rufus, my cutest and friendliest amigurumi crochet pattern! Rufus has been an adorable and charming addition to our home so I wanted to share this crochet pattern with you too so you can make your own crochet doggy doorstop that everyone will fall in love with.
Rufus has a lovable and playful design and he effortlessly holds your doors open whilst adding character to your room. This crochet pattern project is perfect for pet lovers looking to add a touch of personality to their home decor. Go grab your cup of tea, favourite coloured yarn, hook and crochet yourself an adorable furry friend! Don’t forget to use the comment section below to add in a photo of your finished doggy doorstop.
Rufus the Dog Doorstop will be a great addition in any home!!
Stitch Directory - Click on the stitch for a video
Sc - Single Crochet
BLO Dec2tog - Decrease next 2 stitches together in the back loop only
Sc - Single Crochet
BLO Dec2tog - Decrease next 2 stitches together in the back loop only
BLO Dec3tog - Decrease next 3 stitches together in the back loop only
Inc - Increase do an extra Sc in the same stitch
Inc? - The number after the increase shows how many next stitches to increase. i.e. Inc2 - means do 2 Sc in the next 2 sts.
?Inc - The number before the increase shows how many times to increase in the same Stitch. i.e. 2Inc - means do 3 Sc in the next stitch
St(s) - Stitch(es)
Nxt - Next
Rnd - Round
BP - Back Post
St(s) - Stitch(es)
Nxt - Next
Rnd - Round
BP - Back Post
Materials - Click on the item to purchase
* 3.00mm Crochet Hook (US D-3)
* 3 x 50g Balls of Scheepjes Stonewashed - Axinite #831
* 1 x 50g Balls of Scheepjes Stonewashed - Enstatite #832
* Small amount of 4-ply Dark Brown yarn for mouth and marking toes on paws
* Small amount of 4-ply White yarn for dog tag
* 3 x 50g Balls of Scheepjes Stonewashed - Axinite #831
* 1 x 50g Balls of Scheepjes Stonewashed - Enstatite #832
* Small amount of 4-ply Dark Brown yarn for mouth and marking toes on paws
* Small amount of 4-ply White yarn for dog tag
* Small amount of 4 ply Red yarn for dog collar
* Fiberfill (Toy Stuffing)
* 2 x 15mm Brown Safety Eyes
* A 25mm Black Plastic Dog Nose
* Yarn / Tapestry Needle (Sewing together)
* Fiberfill (Toy Stuffing)
* 2 x 15mm Brown Safety Eyes
* A 25mm Black Plastic Dog Nose
* Yarn / Tapestry Needle (Sewing together)
* Stitch Marker
* Cardboard
* Cardboard
* 1 kg of Poly Plastic Pellets (Normal weighted door) or whatever weight you desire in pebbles or sand for heavier doors. Ensure that whatever content you use, it is bagged up several times before being placed inside. It is NOT advised to use dry food, ie. Rice.
OPTIONAL
* 1.5mm Cooper Wire to hold the head into position. Do not add if making for a young child.
* 1.5mm Cooper Wire to hold the head into position. Do not add if making for a young child.
Please Note: all of the links in the materials section are affiliate links to a very reliable and respected UK yarn shop, which I use for all my yarns.

**********************************
Need HELP with this pattern.
Watch these videos
Video 9 - Magic Circle start
Video 10 - Working in continuous rounds
**********************************
Pattern Notes
* Dog Doorstop Pattern is worked in continuous rounds unless otherwise noted. REMEMBER to move your stitch marker onto the first stitch on each new round to help you keep your place.
* Tension Gauge required for this pattern (centre to circumference):
12 Rounds = 6cm (2ins).
Check your gauge and change crochet hook size to obtain this tension
Check your gauge and change crochet hook size to obtain this tension
* Finished Height - 13 ins (33cm) Ear top to Base.
* Max Size of Body is 26 ins (66cm) round.
* Suitable for an Advanced Beginner.
* Pattern is written in US Terminology.
* Max Size of Body is 26 ins (66cm) round.
* Suitable for an Advanced Beginner.
* Pattern is written in US Terminology.
Stitch conversion, if needed
(US Single Crochet (Sc) = UK/AUS/NZ Double Crochet (Dc))
*Warning*
Young children, toddlers should always be supervised if playing with this Doorstop. There may be small pieces that the child can dislodge and the potential for ingestion or respiration injuries.
Please ensure that the yarn used is safe for young children and that all pieces are securely attached to the doorstop firmly.
RUFUS THE DOG DOORSTOP FREE CROCHET PATTERN
Front Paw
Make 2 - before you make up the body piece
With Axinite yarn
Rnd 1 - Using the Magic Circle method - Sc6 (6)
Make 2 - before you make up the body piece
With Axinite yarn
Rnd 1 - Using the Magic Circle method - Sc6 (6)
Rnd 2 - (Inc1) 6 times (12)
Rnd 3 - (Inc1, Sc1) 6 times (18)
Rnd 4 - (Inc3, Sc6) 2 times (24)
Rnd 5 - Sc2, Inc3, Sc9, Inc3, Sc7 (30)
Rnd 6 - Sc4, Inc3, Sc12, Inc3, Sc8 (36)
Rnd 7 - Sc in Bp of all sts. (36) (See photo 1 on page 8)
● Sl st into next st.
Rnd 3 - (Inc1, Sc1) 6 times (18)
Rnd 4 - (Inc3, Sc6) 2 times (24)
Rnd 5 - Sc2, Inc3, Sc9, Inc3, Sc7 (30)
Rnd 6 - Sc4, Inc3, Sc12, Inc3, Sc8 (36)
Rnd 7 - Sc in Bp of all sts. (36) (See photo 1 on page 8)
● Sl st into next st.
Rnd 8 - Sc in all sts (36)
Rnd 9 - (Sc7, BLO Dec2tog) 4 times (32)
Rnd 10 - (BLO Dec2tog) 7 times, Sc18 (25)
Rnd 11 - (BLO Dec2tog ) 4 times, Sc8, Inc1, Sc8, (22)
Rnd 12 - (BLO Dec2tog) 3 times, Sc7, Inc1, Sc6, BLO Dec2tog, (19)
Rnd 9 - (Sc7, BLO Dec2tog) 4 times (32)
Rnd 10 - (BLO Dec2tog) 7 times, Sc18 (25)
Rnd 11 - (BLO Dec2tog ) 4 times, Sc8, Inc1, Sc8, (22)
Rnd 12 - (BLO Dec2tog) 3 times, Sc7, Inc1, Sc6, BLO Dec2tog, (19)
Stuff the Paw.
Rnds 13 & 14 - Sc in all sts (19)
Rnd 15 - Sc2, Inc1, (Sc4, Inc1) 2 times, Sc3, Inc1, Sc2 (23)
Rnds 16 to 29 - Sc in all sts (23)
Rnd 30 - (BLO Dec2tog) 2 times, Sc7, (BLO Dec2tog) 3 times, Sc6 (18)
Rnd 15 - Sc2, Inc1, (Sc4, Inc1) 2 times, Sc3, Inc1, Sc2 (23)
Rnds 16 to 29 - Sc in all sts (23)
Rnd 30 - (BLO Dec2tog) 2 times, Sc7, (BLO Dec2tog) 3 times, Sc6 (18)
Rnd 31 - Sc2, leave remaining stitches in the round unworked.
Stuff the leg.
Press the front and back sides of the paw together and work through the 4 loops to close the opening with Sc9.
Secure all ends.
Back Paw - Part 1
Make 2 - Before you make up the body piece
With Axinite yarn
Ch7
Starting in 2nd ch from hook
Rnd 1 - Sc in nxt 5sts, 3Sc in last ch, working into the bottom side of the same chain, Sc in nxt 4 ch, 2Sc in last ch. (14)
Rnds 2 to 4 - Sc in all sts (14)
Rnd 5 - (Sc6, Inc1) 2 times (16)
Rnds 6 to 14 - Sc in all sts (16)
Rnd 15 - Sc4, leave remainder of row unworked.
Stuff the paw.
Press the front and back sides of the paw together and work through the 4 loops to close the opening with Sc8.
Secure all ends.
Body
Make 1
With Axinite yarn
Rnd 1 - Using the Magic Circle method - Sc6 (6)
Rnd 2 - (Inc1) 6 times (12)
Rnd 3 - (Inc1, Sc1) 6 times (18)
Rnd 4 - Inc1, Sc3, Inc2, Sc5, Inc2, Sc3, Inc1, Sc1 (24)
Rnd 5 - Inc1, Sc5, Inc2, Sc7, Inc2, Sc5, Inc1, Sc1 (30)
Rnd 6 - Sc1, Inc1, Sc6, Inc2, Sc9, Inc2, Sc6, Inc1, Sc2 (36)
Rnd 7 - Sc1, Inc1, Sc8, Inc2, Sc11, Inc2, Sc8, Inc1, Sc2 (42)
Rnd 8 - Sc2, Inc1, Sc9, Inc2, Sc13, Inc2, Sc9, Inc1, Sc3 (48)
Rnd 9 - Sc2, Inc1, Sc11, Inc2, Sc15, Inc2, Sc11, Inc1, Sc3 (54)
Rnd 10 - Sc2, Inc1, Sc13, Inc2, Sc17, Inc2, Sc13, Inc1, Sc3 (60)
Rnd 11 - Sc2, Inc1, Sc15, Inc2, Sc19, Inc2, Sc15, Inc1, Sc3 (66)
Rnd 11 - Sc2, Inc1, Sc15, Inc2, Sc19, Inc2, Sc15, Inc1, Sc3 (66)
Rnd 12 - Sc2, Inc1, Sc17, Inc2, Sc21, Inc2, Sc17, Inc1, Sc3 (72)
Rnd 13 - Sc1, Inc1, Sc20, Inc2, Sc23, Inc2, Sc20, Inc1, Sc2 (78)
Rnd 14 - Sc1, Inc1, Sc22, Inc2, Sc25, Inc2, Sc22, Inc1, Sc2 (84)
Rnd 15 - Sc1, Inc1, Sc24, Inc2, Sc27, Inc2, Sc24, Inc1, Sc2 (90)
Rnd 16 - Sc1, Inc1, Sc27, Inc2, Sc29, Inc2, Sc25, Inc1, Sc2 (96)
Rnd 17 - Sc1, Inc1, Sc29, Inc2, Sc31, Inc2, Sc27, Inc1, Sc2 (102)
Draw outline of your body piece onto the cardboard. Cut out to use as base for your doorstop.
Rnd 18 - Sc1, Inc1, Sc31, Inc2, Sc33, Inc2, Sc29, Inc1, Sc2 (108)
Sl st into next stitch.
Rnd 19 - Sc in Bp of all sts around, creating a right angle edge. (108) (See Photo 1) In the next round you attach the 2 Back Paws. Put the paw over the top of the single crochet stitches at the appropriate place in rnd 20 and work through the 4 loops. (See Photo 2 below)
Rnd 20 - Sc37, (Back Paw Part 1 - Sc8). Sc18, (other Back Paw Part 1 Sc8, Sc37 (108)
Rnd 21 - Sc16, BLO Dec2tog, Sc17, BLO Dec2tog, Sc16, BLO Dec2tog, Sc17, BLO Dec2tog, (Sc15, BLO Dec2tog) 2 times (102)
Rnd 22 - Sc15, BLO Dec2tog, Sc16, BLO Dec2tog, (Sc15, BLO Dec2tog) 3 times, Sc14, BLO Dec2tog (96)
Rnd 23 - Sc8, BLO Dec2tog, Sc15, BLO Dec2tog, (Sc14, BLO Dec2tog) 2 times, (Sc13, BLO Dec2tog) 2 times, Sc7 (90)
Rnd 24 - BLO Dec3tog, Sc27, BLO Dec3tog, Sc29, BLO Dec3tog, Sc25 (84)
Rnd 25 - Sc in all sts (84)
Rnd 26 - BLO Dec2tog, Sc6, BLO Dec2tog, Sc24, (Inc1, Sc8) 2 times, Inc1, Sc23, BLO Dec2tog, Sc6 (84)
Rnd 27 - BLO Dec2tog, Sc5, BLO Dec2tog, Sc23, (Inc1, Sc9) 2 times, Inc1, Sc24, BLO Dec2tog, Sc5 (84)
Rnds 28 & 29 - Sc in all sts (84)
Place the cardboard inside your body piece.
Rnd 30 - BLO Dec2tog, Sc2, BLO Dec2tog, Sc26, BLO Dec2tog, Sc8, BLO Dec2tog, Sc9, BLO Dec2tog, Sc25, BLO Dec2tog, Sc2 (78)
Rnd 31 - Sc in all sts (78)
Rnd 32 - (BLO Dec2tog) 2 times, Sc72, BLO Dec2tog (75)
Rnds 33, 34 & 35 - Sc in all sts (75)
Rnd 36 - Sc1, BLO Dec2tog, Sc20, BLO Dec2tog, (Sc6, Inc1) 3 times, Sc10, BLO Dec2tog, Sc17 (75)
Rnd 31 - Sc in all sts (78)
Rnd 32 - (BLO Dec2tog) 2 times, Sc72, BLO Dec2tog (75)
Rnds 33, 34 & 35 - Sc in all sts (75)
Rnd 36 - Sc1, BLO Dec2tog, Sc20, BLO Dec2tog, (Sc6, Inc1) 3 times, Sc10, BLO Dec2tog, Sc17 (75)
Rnd 37 - Sc in all sts (75)
Rnd 38 - Sc1, Inc1, Sc14, BLO Dec2tog, Sc43, BLO Dec2tog, Sc12 (74)
Rnds 39 & 40 - Sc in all sts ( 74)
Rnd 41 - Sc1, BLO Dec2tog, Sc8, BLO Dec2tog, Sc4, BLO Dec2tog, Sc37, BLO Dec2tog, Sc6, BLO Dec2tog, Sc8 (69)
Rnd 38 - Sc1, Inc1, Sc14, BLO Dec2tog, Sc43, BLO Dec2tog, Sc12 (74)
Rnds 39 & 40 - Sc in all sts ( 74)
Rnd 41 - Sc1, BLO Dec2tog, Sc8, BLO Dec2tog, Sc4, BLO Dec2tog, Sc37, BLO Dec2tog, Sc6, BLO Dec2tog, Sc8 (69)
Rnds 42 & 43 - Sc in all sts (69)
In the next round you attach the 2 Front Paws. Put the paw over the top of the single crochet stitches at the appropriate place in row 20 and work through the 4 loops (See photo 2 below)
Rnd 44 - Sc27, (front paw Sc9)(front paw Sc9), Sc24 (69)
Rnd 45 - Sc3, BLO Dec2tog, Sc4, BLO Dec2tog, Sc51, BLO Dec2tog, Sc5 (66)
Rnd 46 - Sc3, BLO Dec2tog, Sc13, BLO Dec2tog, Sc12, (Inc1, Sc4) 2 times, Inc1, Sc10, BLO Dec2tog, Sc11 (66)
Rnd 47 - Sc in all sts (66) (See Photo 3 below)
Rnd 45 - Sc3, BLO Dec2tog, Sc4, BLO Dec2tog, Sc51, BLO Dec2tog, Sc5 (66)
Rnd 46 - Sc3, BLO Dec2tog, Sc13, BLO Dec2tog, Sc12, (Inc1, Sc4) 2 times, Inc1, Sc10, BLO Dec2tog, Sc11 (66)
Rnd 47 - Sc in all sts (66) (See Photo 3 below)
● Bag your heavy stuffing several times to ensure it will not leak, then place into centre of the body.
● Optional - Cut a 26 inch length of 1.5mm cooper wire and curl each end. Fold the wire in half and place the two ends on each side of your stuffing bag (Curls ends at the cardboard base). Leaving the folded end sticking out to hold the head in place once attached.
● Cover the inner sides of the body with the toy stuffing.
● Continue crocheting the top of the body.
Rnd 48 - Sc2, BLO Dec2tog, Sc4, BLO Dec2tog, Sc6, BLO Dec2tog, Sc34, BLO Dec2tog,(Sc4, BLO Dec2tog) 2 times (60)
Rnd 49 - Sc in all sts (60)
Rnd 50 - (Sc8, BLO Dec2tog) 6 times (54)
Rnd 49 - Sc in all sts (60)
Rnd 50 - (Sc8, BLO Dec2tog) 6 times (54)
Body continued…
Rnd 51 - Sc in all sts (54)
Rnd 52 - (Sc7, BLO Dec2tog) 6 times (48)
Rnd 53 - Sc in all sts (48)
Rnd 54 - (Sc6, BLO Dec2tog) 6 times (42)
Rnd 55 - Sc in all sts (42)
Rnd 56 - (Sc5, BLO Dec2tog) 6 times (36)
Rnd 57 - Sc in all sts (36)
Rnd 58 - (Sc4, BLO Dec2tog) 6 times (30)
Rnd 51 - Sc in all sts (54)
Rnd 52 - (Sc7, BLO Dec2tog) 6 times (48)
Rnd 53 - Sc in all sts (48)
Rnd 54 - (Sc6, BLO Dec2tog) 6 times (42)
Rnd 55 - Sc in all sts (42)
Rnd 56 - (Sc5, BLO Dec2tog) 6 times (36)
Rnd 57 - Sc in all sts (36)
Rnd 58 - (Sc4, BLO Dec2tog) 6 times (30)
Fasten off and stuff to the top of the body and leave for now.
Head
Make 1 - with Enstatite Yarn
Ch20, working into 2nd chain from hook.
Rnd 1 - Sc in nxt 18 chs, 3Sc in last ch, continue working on the bottom loops of the chain Sc in nxt 17, 2Sc in last ch. (40)
Rnd 2 - Inc2, Sc17, Inc3, Sc17, Inc1 (46)
Rnd 3 - (Inc3, Sc20) 2 times. (52)
Rnd 4 - Sc1, Inc3, Sc23, Inc3. Sc22 (58)
Rnd 5 - Sc3, Inc3, Sc26, Inc3, Sc23 (64)
Rnd 6 - Sc5, Inc3, Sc29, Inc3, Sc24 (70)
Rnd 7 - Sc in all sts (70)
Rnd 8 - Sc21, Inc1, Sc8, Inc1, Sc25, (Inc1, Sc2) 3 times, Inc, Sc4 (76)
Rnds 9 to 13 - Sc in all sts (76)
Rnd 14 - Sc8, BLO Dec2tog, (Sc17, BLO Dec2tog) 2 times, Sc28 (73)
Rnds 15 & 16 - Sc in all sts (73)
Rnd 17 - Sc5, (BLO Dec2tog, Sc2) 2 times, BLO Dec2tog, Sc26, (BLO Dec2tog, Sc2) 2 times, BLO Dec2tog, Sc22 (67)
Rnds 18 & 19 - Sc in all sts (67)
Rnd 20 - Sc58, BLO Dec2tog, Sc7 (66)
Rnd 21 - Sc2, BLO Dec2tog, (Sc5, BLO Dec2tog) 2 times, Sc18, BLO Dec2tog, (Sc5, BLO Dec2tog) 2 times, Sc14 (60)
Rnd 22 - Sc in all sts (60)
Rnd 23 - Sc2, BLO Dec2tog, Sc3, BLO Dec2tog, Sc8, BLO Dec2tog, Sc9 BLO Dec2tog, Sc8, BLO Dec2tog, Sc3. BLO Dec2tog, Sc15 (54)
Rnd 24 - Sc in all sts (54)
Rnd 25 - Sc1, BLO Dec2tog, Sc10, BLO Dec2tog, (Sc6, BLO Dec2tog) 2 times, Sc9, (BLO Dec2tog, Sc5) 2 times (48)
Rnd 26 - Sc in all sts (48)
Rnd 27 - (Sc6, BLO Dec2tog) 6 times (42)
Rnd 28 - Sc in all sts (42)
Rnd 29 - (Sc5, BLO Dec2tog) 6 times (36)
Rnd 30 - Sc in all sts (36)
Rnd 31 - Sc2, BLO Dec2tog, (Sc4, BLO Dec2tog) 5 times, Sc2 (30)
Rnd 32 - Sc in all sts (30)
Sl st into next st.
Note the last stitch is on the back of the head.
Fasten off and leave long yarn tail, to use to attach head to the body at a later stage.
Ears
Make 2
With Enstatite yarn
Rnd 1 - Using the Magic Circle method - Sc4 (4)
Rnd 2 - (Inc1) 4 times (8)
Rnd 3 - (Sc1, Inc1) 4 times (12)
Rnds 4, 5 & 6 - Sc in all sts (12)
Rnd 7 - (Sc2, Inc1) 4 times (16)
Rnd 8 & 9 - Sc in all sts (16)
Rnd 10 - (Sc3, Inc1) 4 times (20)
Rnds 11 & 12 - Sc in all sts (20)
Rnd 13 - (Sc4, Inc1) 4 times (24)
Rnds 14 & 15 - Sc in all sts (24)
Rnd 16 - BLO Dec2tog, Sc8, (BLO Dec2tog) 2 times, Sc8, BLO Dec2tog (20)
Rnd 17 - BLO Dec2tog, Sc6, (BLO Dec2tog) 2 times, Sc6, BLO Dec2tog (16)
Sl st in nxt st, do not stuff.
Press back and front together working through all 4 loops, Sc in the 8 sts.
Leave enough yarn tail to sew ear onto head.
Leave enough yarn tail to sew ear onto head.
Snout
Make 1
With Axinite yarn
Rnd 1 - Using the Magic Circle method - Sc8 (8)
Rnd 2 - (Sc1, Inc1) 4 times (12)
Rnd 3 - Sc3, 2Inc, Sc5, 2Inc, Sc2 (16)
Rnd 4 - Inc1, Sc3, 2Inc, Sc3, Inc1, Sc3, 2Inc, Sc3 (22)
Rnd 5 - Sc in all sts (22)
Rnd 6 - Inc1, Sc2, (Inc1, Sc1) 2 times, Inc1, Sc3, Inc1, Sc2, (Inc1, Sc1) 2 times, Inc1, Sc3 (30)
Rnd 7 - (Sc4, Inc1) 6 times (36)
Rnd 8 - Sc2, (Inc1, Sc5) 5 times, Inc1, Sc3 (42)
Rnd 9 - Sc8, (Inc1, Sc4) 2 times, Inc1, Sc6, (Inc1, Sc4) 2 times, Inc1, Sc6 (48)
Rnd 10 - Sc9, (Inc1, Sc2) 2 times, Inc1, Sc20, (Inc1, Sc2) 2 times, Inc1, Sc5 (54)
Rnd 11 - Sc in all sts (54)
Rnd 12 - Sc9, (BLO Dec2tog, Sc2) 2 times, BLO Dec2tog, Sc20, (BLO Dec2tog, Sc2) 2 times, BLO Dec2tog, Sc5 (48)
Rnd 13 - (BLO Dec2tog, Sc6) 6 times (42)
Rnd 14 - (BLO Dec2tog) twice, Sc17, (BLO Dec2tog) twice, Sc17 (38)
Rnd 15 - Sc in next 3 sts, (3) Ch1, turn - leave the rest of the round unworked. Continue working flat with the "Blaze" section.
Blaze (Stripe between the eyes)
Row 1 - Sc3, ch1, turn (3)
Row 2 - Inc1, Sc1, Inc1, ch1, turn (5)
Row 3 - Sc5, ch1, turn (5)
Row 4 - Inc1, Sc3, Inc1, ch1, turn (7)
Row 5 - Sc7, ch1, turn (7)
Row 6 - BLO Dec2tog, Sc3, BLO Dec2tog, ch1 turn (5)
Row 7 - BLO Dec2tog, Sc1, BLO Dec2tog (3)
Fasten off.
Row 2 - Inc1, Sc1, Inc1, ch1, turn (5)
Row 3 - Sc5, ch1, turn (5)
Row 4 - Inc1, Sc3, Inc1, ch1, turn (7)
Row 5 - Sc7, ch1, turn (7)
Row 6 - BLO Dec2tog, Sc3, BLO Dec2tog, ch1 turn (5)
Row 7 - BLO Dec2tog, Sc1, BLO Dec2tog (3)
Fasten off.
Place your plastic nose just above the magic circle start on the snout, secure with the nose safety back and stuff the snout. Leave a long tail to sew the snout and blaze to the head.
Tail
Make 1
With Enstatite yarn
Rnd 1 - Using the Magic Circle method - Sc4 (4)
Rnd 2 - (Sc1, Inc1) 2 times (6)
Rnds 3 & 4 - Sc in all sts (6)
Rnd 5 - (Sc1, Inc1) 3 times (9)
Rnds 6 & 7 - Sc in all sts (9)
Rnd 8 - Sc1, Inc1, Sc4, Inc1, Sc2 (11)
Rnds 9, 10 & 11 - Sc in all sts (11)
Rnd 12 - BLO Dec2tog, Sc4, Inc2, Sc3 (12)
Change yarn to Axinite.
Rnds 13 & 14 - Sc in all sts (12)
Rnd 15 - BLO Dec2tog, Sc4, Inc2, Sc4 (13)
Rnd 15 - BLO Dec2tog, Sc4, Inc2, Sc4 (13)
Rnds 16, 17 & 18 - Sc in all sts (13)
Rnd 19 - BLO Dec2tog, Sc11 (12)
Sl st into next st.
Rnd 19 - BLO Dec2tog, Sc11 (12)
Sl st into next st.
Stuff the tail.
Press the front and back sides of the tail together and work through the 4 loops to close the opening with Sc6. Leave a yarn tail to sew the tail onto the body.
Back Paw Part 2
Make 2
With Axinite yarn
Rnd 1 - Using the Magic Circle method - Sc6 (6)
Rnd 2 - (Inc1) 6 times (12)
Make 2
With Axinite yarn
Rnd 1 - Using the Magic Circle method - Sc6 (6)
Rnd 2 - (Inc1) 6 times (12)
Rnd 3 - (Sc1, Inc1) 6 times (18)
Rnd 4 - (Sc2, Inc1) 6 times (24)
Rnd 5 - (Sc3, Inc1) 6 times (30)
Rnd 6 - (Sc4, Inc1) 6 times (36)
Rnd 7 - (Sc5, Inc1) 6 times (42)
Rnd 8 - (Sc6, Inc1) 6 times (48)
Rnd 9 - (Sc7, Inc1) 2 times, Sc2, (BLO Dec2tog, Sc1) 10 times (40)
St in next st.
Rnd 10 - Sc in Bp of all sts (40) (See Photo 1 below)
Rnd 11 - (Sc3, BLO Dec2tog) 8 times, (32)
Rnd 12 - (Sc2, BLO Dec2tog) 8 times (24)
Rnd 13 - (Sc1, BLO Dec2tog) 8 times (16)
Rnd 14 - (BLO Dec2tog) 8 times (8)
Fasten off, stuff and weave the yarn tail through the 8 sts on the last round and pull to close.
Rnd 11 - (Sc3, BLO Dec2tog) 8 times, (32)
Rnd 12 - (Sc2, BLO Dec2tog) 8 times (24)
Rnd 13 - (Sc1, BLO Dec2tog) 8 times (16)
Rnd 14 - (BLO Dec2tog) 8 times (8)
Fasten off, stuff and weave the yarn tail through the 8 sts on the last round and pull to close.
Eyelid
With Enstatite yarn - (Make 2)
Ch5, working in 2nd ch from hook, Sc4.
Fasten off.
Collar
With Red Yarn - (Make 1)
Ch29, working in 2nd ch from hook, Sc28.
Fasten off.
Dog Tag - With White Yarn - (Make 1)
Magic Circle Sc6, next round (Inc1) 6 times, (12)
Fasten off.
Making Up Section
1. Stuff the head with lots of toy stuffing.
2. With the front of the head facing you, place your stuffed snout onto the face, the centre of the bottom of the snout is 1 round up from the last round. Pin the snout into place and the blaze (stripe) needs to be centred on the Head. (See Photo 4 below).
3. Insert the 2 eyes equally on each side of the blaze. (See Photo 5 below).
4. Pin on the two ears.
5. Once you are happy with the positions, un-stuff the head and secure the safety backs onto the eyes. Re-stuff the head and sew the snout in place.
6. Sew on the ears.
7. Decide on the angle you want the head to face and sew up the openings between the head and the body pieces, add additional stuffing just before you seal this opening.
8. Attach your tail to the back of the body and tack it halfway up to make it sit upright. (See Photo 6 below)
9. Place a Back paw part 2 piece onto the body, see photo for positioning and sew it into place. Repeat for the other back paw. The flatter side should be positioned close to the back of the doorstop. (See Photo 7 & 8 below).
10. Sew on the eyelids to sit just above and over the top of the eyes. (See Photo 9 below)
11. With the dark brown, sew a mouth onto the snout just under the plastic nose.
12. On the paws, mark the toes with the dark brown yarn.
13. Wrap and secure the collar around the neck.
14. Sew the dog tag to the centre of the chest just under the dog collar. (see photo 10 below)

Photo 1
Showing the effect of working into the Back post.
Showing the effect of working into the Back post.

Photo 2
Working over the 4 loops.
Working over the 4 loops.

Photo 3
Stuff the body.

Photo 4
Placing the snout.

Photo 5
Position the facial features.
Position the facial features.

Photo 6
Position the Tail.

Photo 7
Showing the positioning of Back Paw Part 2.
Showing the positioning of Back Paw Part 2.

Photo 8
The flatter part of the Back Paw Part 2 is to be positioned to the back of the body.
The flatter part of the Back Paw Part 2 is to be positioned to the back of the body.

Photo 9
Position the eyelid.
Position the eyelid.

Photo 10
Collar and tag.
Finished Photos


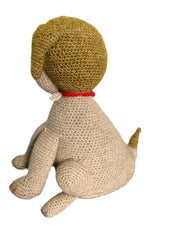
Well Done!!!
Hope you enjoyed making your new Rufus the Dog Doorstop.
Hope you enjoyed making your new Rufus the Dog Doorstop.
Copyright
Please note that all crochet patterns purchased with Peach.Unicorn Designs are protected by UK copyright law. Reproduction or distribution of this pattern is strictly prohibited unless specially authorised. This includes any form of reproduction on the Internet, posting, scanning, photocopying or emailing. Derivative works created using this pattern are also strictly prohibited by copyright law.
Please note that all crochet patterns purchased with Peach.Unicorn Designs are protected by UK copyright law. Reproduction or distribution of this pattern is strictly prohibited unless specially authorised. This includes any form of reproduction on the Internet, posting, scanning, photocopying or emailing. Derivative works created using this pattern are also strictly prohibited by copyright law.
